5. Deploying to Github Pages
We are going to deploy our site to Github Pages using Github Actions.
Actions and Workflows
Github has created a good video covering Github Actions (I promise this one isn’t a rickroll):
See also
The Github Docs Understanding Github Actions page is helpful, as is the Using workflows page. For a hands-on tutorial, checkout Quickstart for Github Action
Workflow for Building Site and Pushing
The workflow below can be used for building a sphinx site and pushing it to Github:
name: Sphinx build

on: push

jobs:
  sphinx-build:
    runs-on: ubuntu-latest
    steps:
    - uses: actions/checkout@v2
    - name: Build HTML
      with:
        pre-build-command: "apt install -y pandoc"
      uses: ammaraskar/sphinx-action@0.4
    - name: Upload artifacts
      uses: actions/upload-artifact@v1
      with:
        name: html-docs
        path: docs/_build/html/
    - name: Deploy
      uses: peaceiris/actions-gh-pages@v3
      if: github.ref == 'refs/heads/main'
      with:
        github_token: ${{ secrets.GITHUB_TOKEN }}
        publish_dir: docs/_build/html
Let’s break down the steps:
First, we checkout the repo.
Next, we build the sphinx page. By default, it will install packages within
docs/requirements.txt, but we also need the container to install pandocs for everything to work.Next, we upload the built site.
Deploy the site.
Adding This Workflow to Your Repo
Let’s create a folder (in
github-pages-demo, notdocs) called “.github” and then a folder within that called “workflows”. Within that folder, create a file called “SphinxBuild.yml” and copy/paste the above code into.Pushing The Repo
Add and commit your changes, then push it!:
git add .
git commit -a
git push origin main
Let’s check on our repo to see if the action ran. Go to Github and find your fork of the repo. You should see an “Actions” tab. We can see our Actions here:
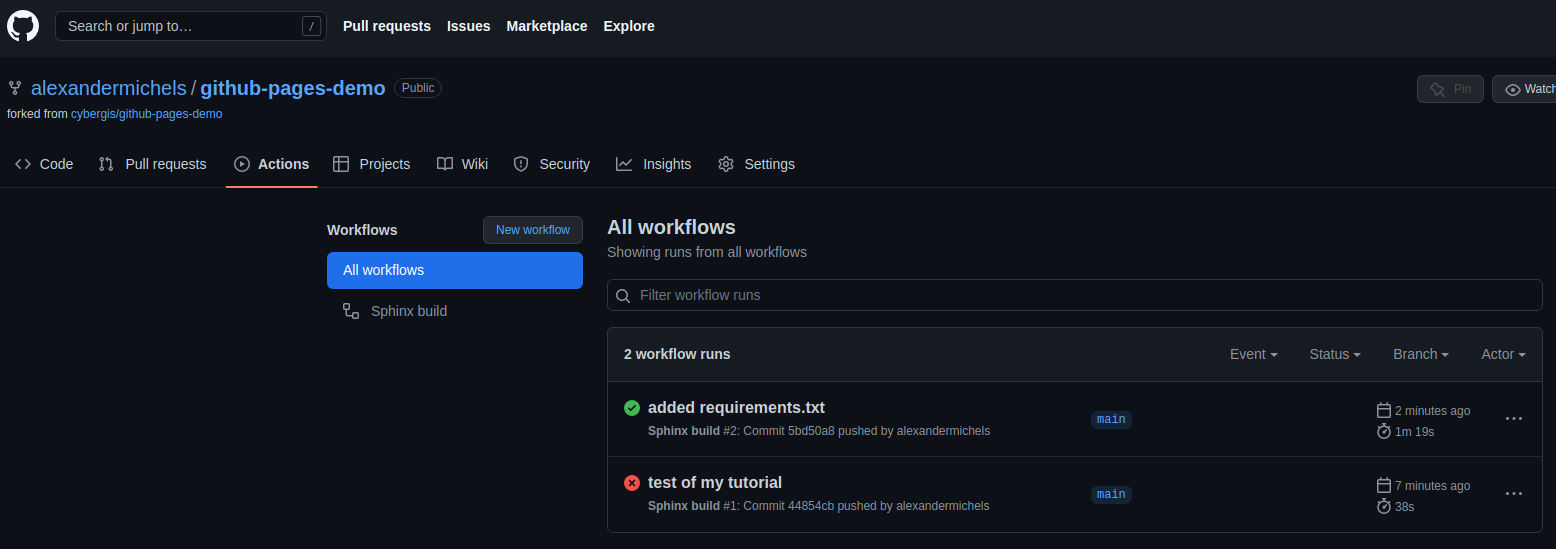
The Github Actions page for the repo.
You can also click on workflow runs to get details and logs on your workflows as shown below:

Workflow details
Github Pages
Let’s see if our page is up! Go to
https://<your github username>.github.io/github-pages-demo. You should see a 404 eror. That’s because we have to enable Github pages first. However, you go to the repo’s page, you’ll notice a new branch:gh-pages. This is our built site!So how do we get this working? On the Github Repo’s page, go to the “Settings” tab, then in the menu select “Pages”. This should bring you to the page below:
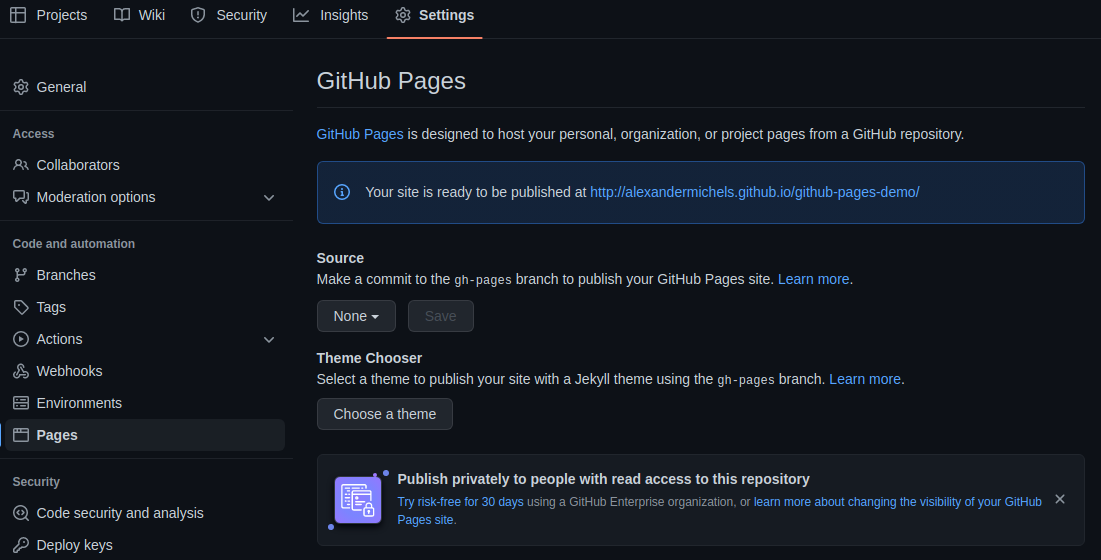
Github Pages page in the Settings of your repo.
Under the “Source” heading you will see a dropdown that says “None”. Click on the dropdown and select “gh-pages” (this is where our workflow uploads the built site). For the folder dropdown, we can leave it as “/ (root)”. When in doubt, you could check that branch to look for where your built site went. Click save. It will take a couple of minutes for the 404 error to go away, but your page should eventually show up!